How to Install WordPress on AWS EC2
This guide will walk you through connecting an AWS EC2 Instance to SpinupWP. Before you start this process, you will need to sign up for an Amazon AWS account if you don’t already have one.
Once signed in, navigate to Services > EC2. If you’re presented with the EC2 dashboard, click Launch Instance about halfway down the screen.

Alternatively, if you’re presented with the list of instances, click Launch Instances on the top right of that list.

You’ll be asked to choose an Amazon Machine Image (AMI), select “Ubuntu Server 22.04 LTS”, the “64-bit (x86)” version.

You’ll be asked to choose the Instance Type. For this guide, we’ll be using the default “t2.micro” instance, which has 1 vCPU and 1GB of memory. Click Review and Launch.

A modal will appear asking you to choose a key pair. As you’ll be adding the SpinupWP SSH key to the instance’s authorized_keys file before we provision the server, select “Proceed without a key pair” from the dropdown, check the checkbox, and click Launch Instances.

If everything works as expected, you’ll be presented with the “Launch Status” screen. Click View Instances to continue.

The newly created instance will appear in your Instances list, with an Instance State of “Running”. The next step is to connect to the instance so that we can add the SpinupWP SSH key to the authorized_keys file. Tick the checkbox next to the Instance in the list, then click the Connect button.

The next “Connect to Instance screen” shows the details of the instance. Make a note of the “Public IP address” and click Connect. This will open a terminal connection via a new browser window or tab.

The SSH console will connect using the default SSH user which is generated based on the type of AMI you used. In the case of Ubuntu, the username is ubuntu.
Now, head over to SpinupWP and click Spin Up a New Server followed by Use Another Provider.

Choose AWS from the list of supported providers.

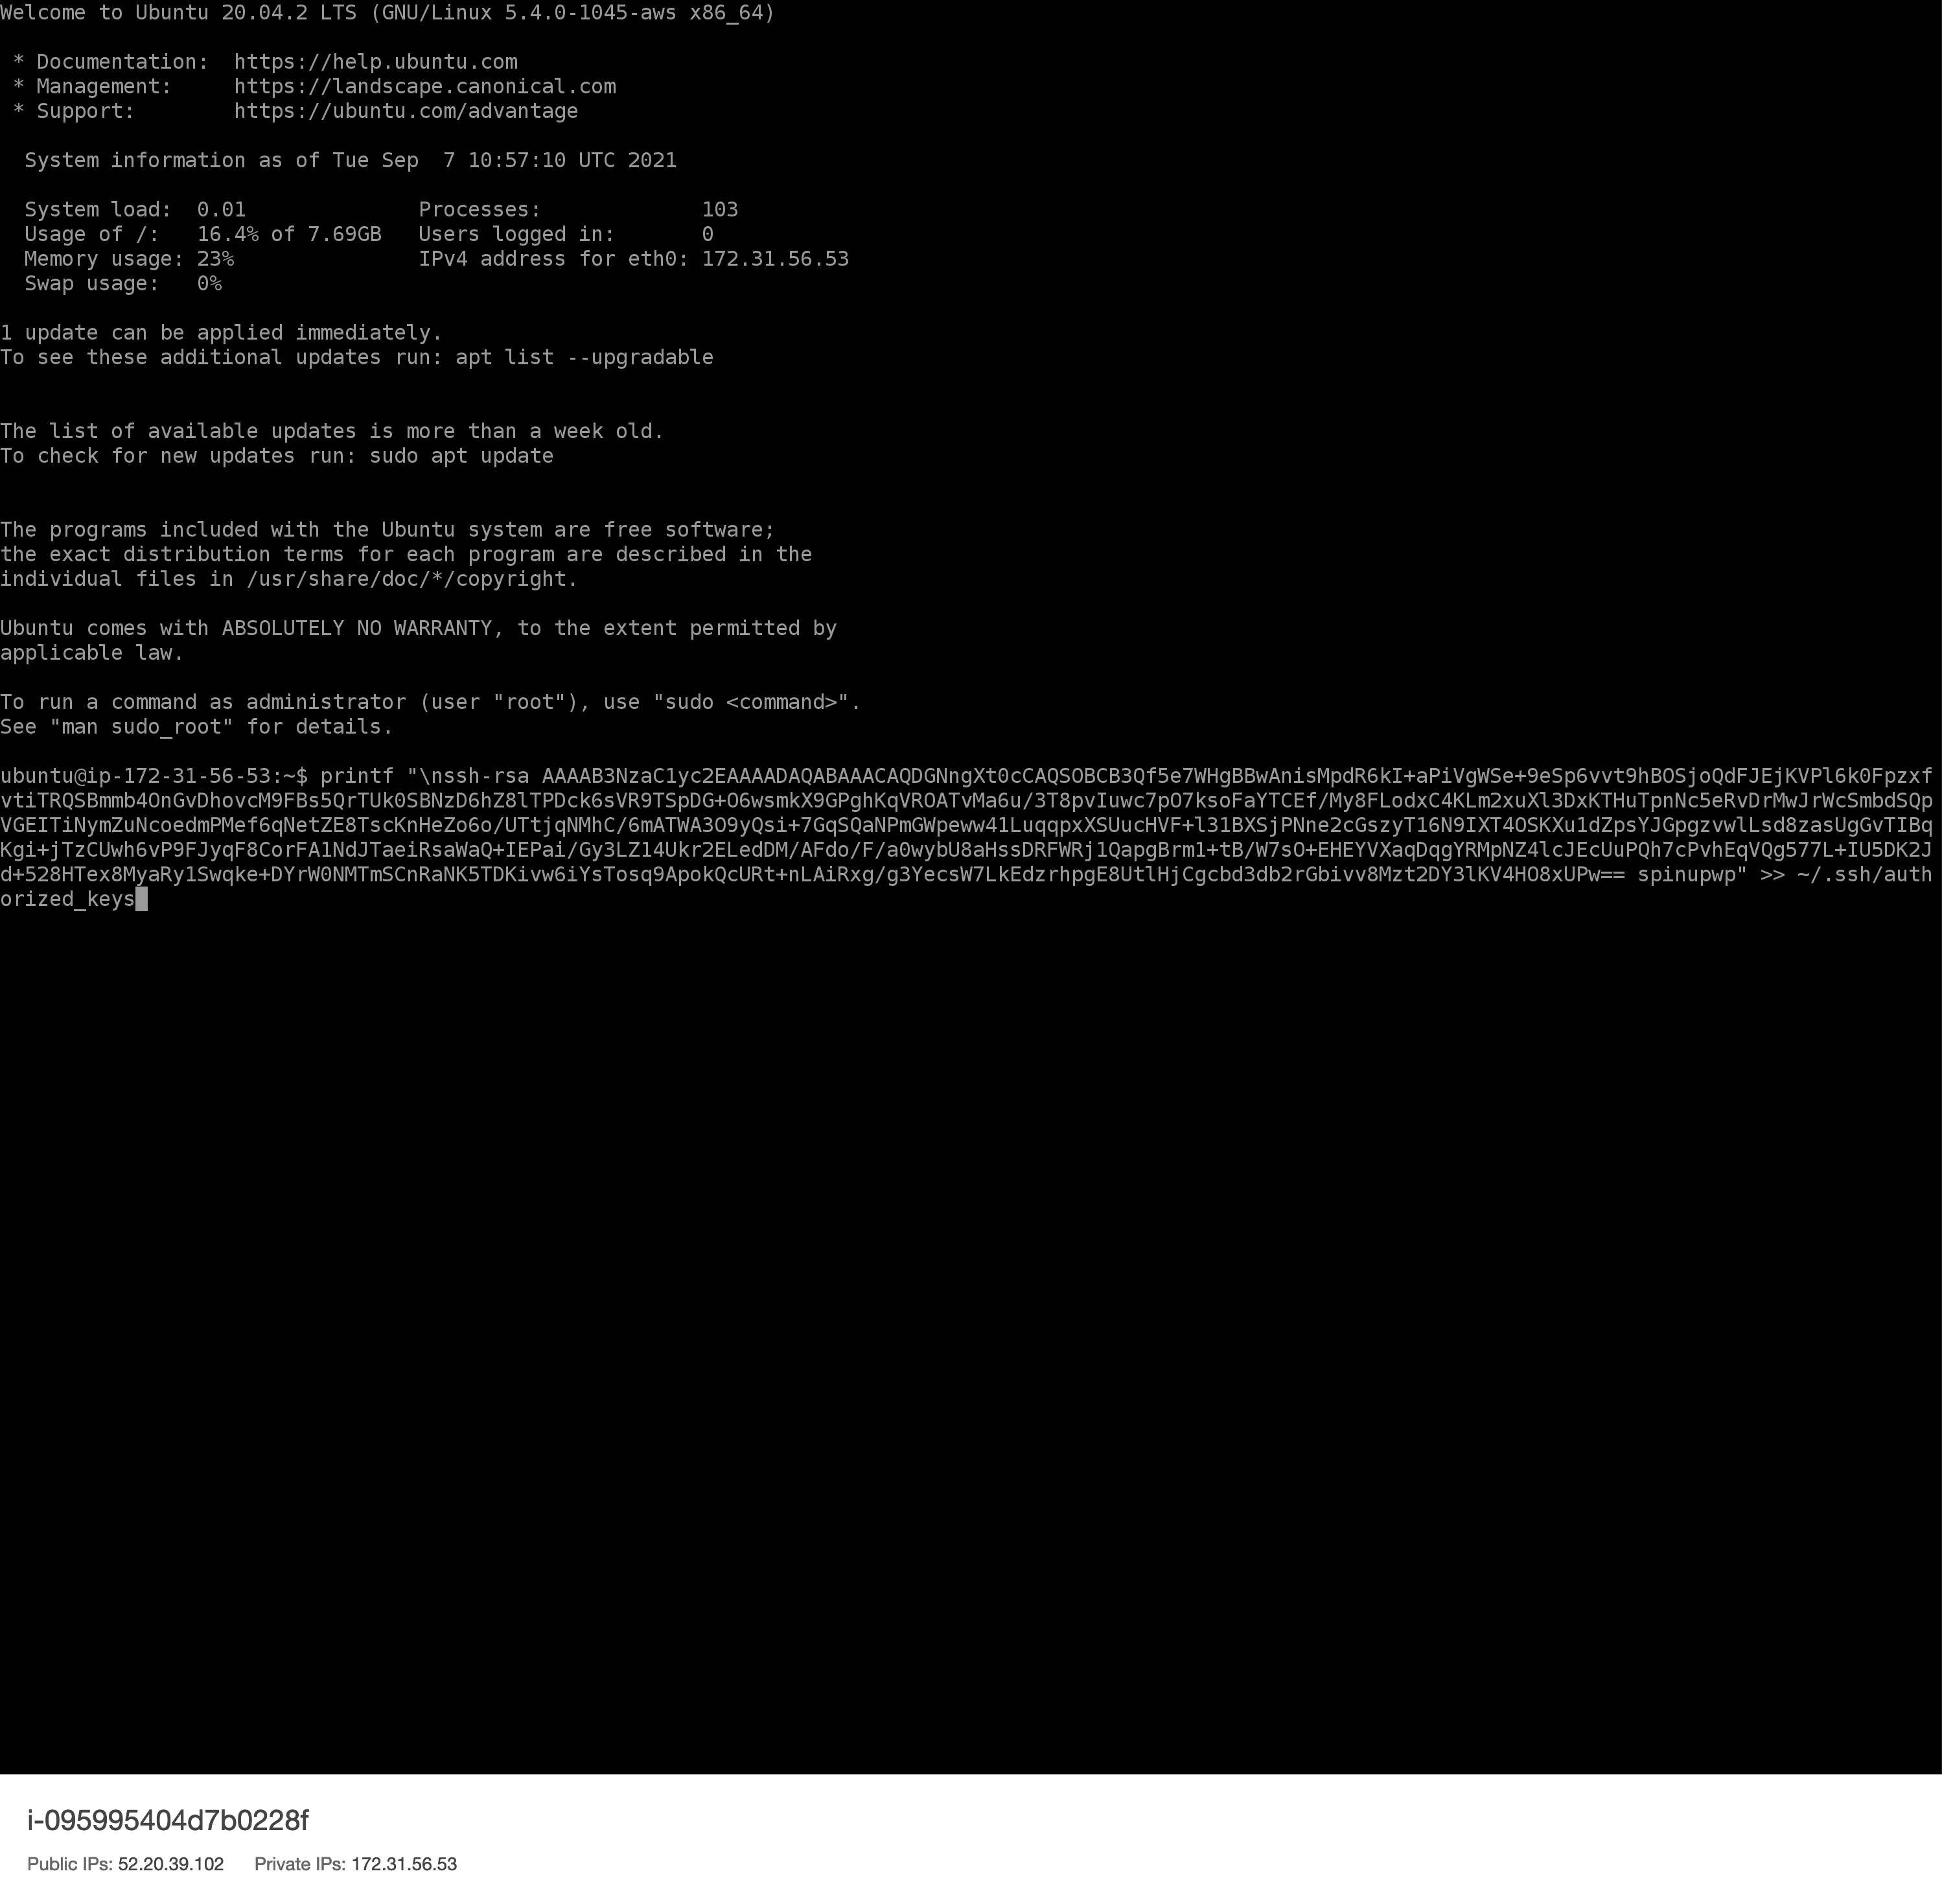
Enter the server’s external “IP address”, the “SSH Port” should default to 22 and the “SSH Username” to ubuntu, and select Public Key authentication. Copy the command provided by SpinupWP for adding the SpinupWP SSH key to the EC2 instance’s authorized_keys file.

Paste this string into the SSH terminal browser window you opened earlier, and hit Enter.
Switch back to SpinupWP and confirm that it can connect to the EC2 instance by Next. Once you see the success message, you can Click Next again to continue.

Enter the server’s hostname and choose a timezone, then select the desired database server. Click Provision Server to begin the provisioning process.
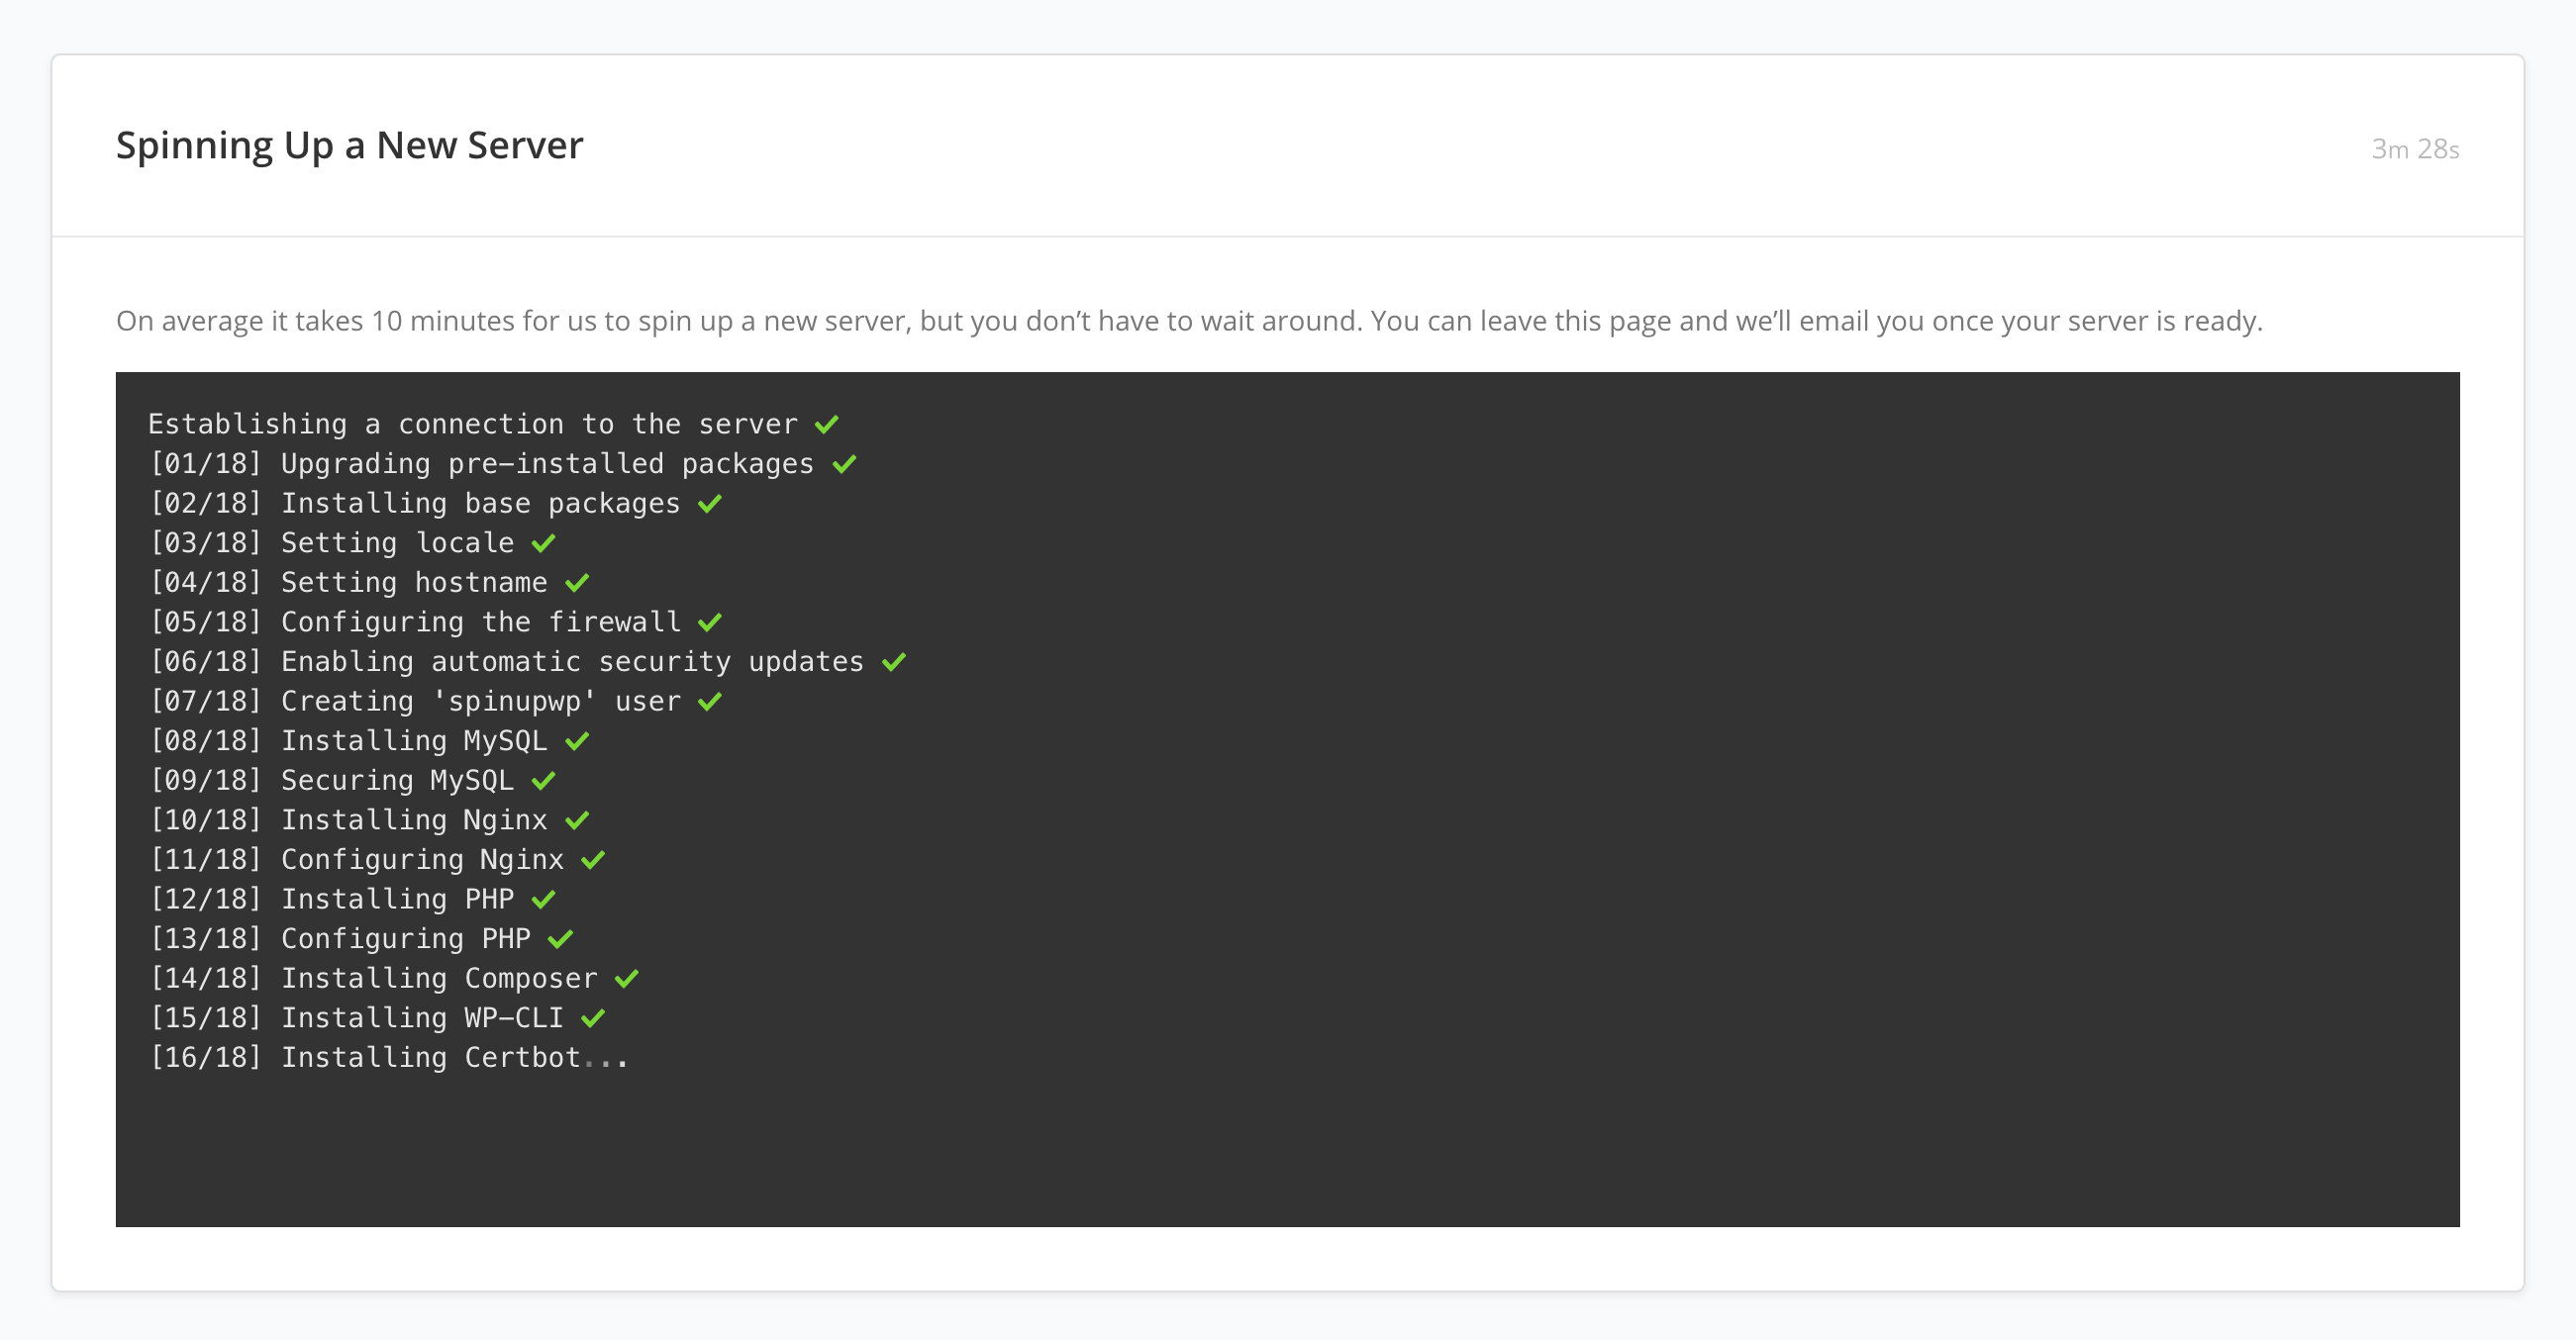
Once the server has finished provisioning you’re ready to start adding sites. Check out our Getting Started doc if you need more information.